My previous tutorial was a detailed guide to building and constructing the wrecked and blown up Land Raiders, so it seems sensible to follow up with a “How to paint them” tutorial now.
Here is the first
part of how to paint the wrecked and blown up Land Raider. It’ll take two
tutorials, because there are numerous stages and elements to be painted, not to
mention they’re not actually finished yet….
Painting a wrecked or blown up Grey Knight Land Raider.
Painting a wrecked or blown up Grey Knight Land Raider.
Materials that
you’ll need are:
An airbrush (if you
have one) plus compressor, spray booth (again, if you have one), Vallejo
Airbrush Black Primer, concentrated screen wash or alternitively a can of black
undercoat spray. A selection of paint brushes including a small decorators paint brush as well as the usual selection of Citdael paint brushes or equivalents.
A selection of Citadel paints including: Boltgun Metal, Dark Flesh, Catachan Green, Camo Green, Rotting Flesh, Bleached Bone, Liche Purple, Warlock Purple, Skull White, Ardcoat, Leviathon Purple, Baal Red, Asurmen Blue, Lahmian Glaze, Khemri Brown, Scorched Brown and Chaos Black.
A supply of water, a paint pallette or two and of course kitchen towel for drybrushing.
Please Note:
1) Games Workshop released an all new paint range, as such the paint names I’m using in this article are old, but if you want to purchase the paints and need to find their new names, you can find a comparison chart at Games Workshops website by clicking here.
2) It’s also important to note that you’ll need to be working in a well ventilated area when undercoating or basecoating using either an airbrush or spray paint. Health and safety and all that jazz….
Part 11) Games Workshop released an all new paint range, as such the paint names I’m using in this article are old, but if you want to purchase the paints and need to find their new names, you can find a comparison chart at Games Workshops website by clicking here.
2) It’s also important to note that you’ll need to be working in a well ventilated area when undercoating or basecoating using either an airbrush or spray paint. Health and safety and all that jazz….
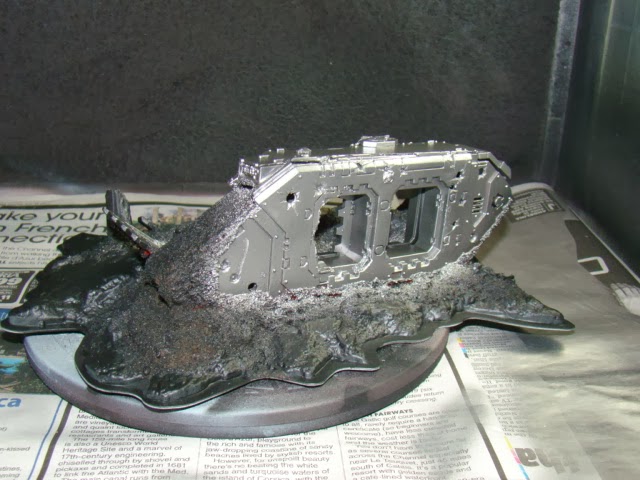
Step 1 – Place your wrecked / blown up Land raider in your spray booth or in / on a suitable alternative e.g. cardboard box in a ventilated area.
Step 2 – Mix up a batch of Vallejo Black Airbrush Primer and concentrated screen wash at a ratio of approximately 2:1 and prepare your airbrush, (alternatively shake up a can of black spray paint). Once ready carefully apply two thin layers of undercoat over the models, leaving them to dry thoroughly between coats. Once the undercoat is covering them, leave them to dry and clean your airbrush ready for the next colour.

Step 3 – Mix up a batch of Bolt Gun Metal with concentrated screen wash, again at a ratio of approximately 2:1 and load up the airbrush. Then carefully spray two or more thin layers all over the pieces of the Land Raiders and dead Grey Knights that are protruding from the ground and craters. (Alternatively you can water down Boltgun metal and apply it with a large paint brush, if so apply with several thin layers, drying between each layer.) Once finshed with your airbrush, again clean it ready for the next colour.


Step 4 – Mix up a batch of Dark Flesh with concentrated screen wash, again at a ratio of approximately 2:1 and load up the airbrush. Then carefully spray two or more thin layers all over the ground and craters. Don’t worry about being too careful or precise with this, it won’t matter if some of the Dark Flesh is painted on the Land Raider hulls, as you can see in the photo below. (Alternatively you can water down Dark Flesh and apply it with a large paint brush. If so apply with several thin layers, drying between each layer.) Once finished with your airbrush, again clean it ready for the next colour.


Step 5 – Once the Dark Flesh has dried, it’s time to make use of the small decorators paint brush. Load a pallette with Catachan Green and using the decorators paint brush “Over-brush” all over the ground and craters. Again don’t worry too much about being precise, it’s fine to get the Catachan Green on the hulls of the Land Raiders.


Step 6 - Next load your palette with Camo Green and using the decorators paint brush “Dry-brush” all over the ground and craters; again don’t worry too much about being precise, it’s fine to get the Camo Green on the hulls of the Land Raiders.

Step 7 - Once you've completed step 6, load your pallette with Rotting Flesh and using the decorators paint brush “Dry-brush” all over the ground and craters; as before don’t worry about being precise.

Step 8 – The last “Dry-brush” layer for the ground is Bleached Bone, again applied by paint brush. The ground colour should end up looking similar to this. As you can see the dry-brushing has ended up on the hull of the Land Raider as well.

Step 9 – Now the ground and crater areas have been painted it’s time to move onto painting the detail on the models and the Land Raider hulls themselves.
This will vary
depending on the details you've added to the model. In the case of my wrecked
and blown up Land Raiders, I've added crystals like my Grey Knight objective
markers to tie in to my imagined background and theme of my army; a dead Grey
Knight, evidence of human bones and evidence of the odd dead Chaos Space Marine
and Daemons (…the best kind in my opinion).
In the case of the
crystals and human bones I added to my wrecked and blown up Land Raider, I painted them using the techniques in my
previous tutorial “Step by Step: How to make and paint crystal objective
markers.” and they should end up looking something akin to this.

How do I paint the rest of the details and the Land Raider hulls themselves you ask? I’m afraid you’ll have to be patient and await part 2 of this tutorial. Until then thank you for reading and happy hobbying…
No comments:
Post a Comment