It's been several months since I've last posted something up on the blog, much to my dismay life has got in the way. (Hey that rhymes).
But I've just this evening, managed to write up my next tutorial based on my past painting exploits.
The tutorial is based on a miniature that I painted for my best friends favourite Warhammer Fantasy player, Jobie.
The miniature in question was the Gamesday 2011 Skaven Warlord Miniature and was destined to be a birthday present that a Skaven obsessive would love and take great pleasure unleashing against his opponents (or at least this was my aim).
Materials I used:
A selection of paint brushes, grey undercoat (spray paint or airbrush paint), a selection of Citadel Colour, plus Foundation Paints plus Washes (mentioned at each stage of the tutorial), plenty of clean water, and multiple daylights bulbs and patience. The miniature, a small square base, a square resin detail piece from the Citadel Warhammer basing kit, a 40mm square base and a 40mm square resin display plinth.
Please note: I use a mix of old and new Games Workshop paints since I still have a huge supply of GW's old range. I will try to give both the old and new names of the paints used where possible.
Step 1 - The display plinth and Warlords base.
 I glued the 40mm square base on top of the resin plinth and using the small square base, marked out a square in the middle of the 40mm base.
 I then cut the hole out carefully to enable the small warhammer square base to fit in to the hole. Once this was done I glued the resin detail piece on top of the small base.
Then I mixed up a ton of Green stuff and carefully built up a layer on the 40mm base and sculpted it to matched the floor of the resin detail piece. I then left it all to dry.
Once the base and plinth were sorted. I drilled and pinned the miniature to the small base and when the glue had dried and the green stuff had cured, I undercoated the whole thing using Halfords Grey Primer.
Next I began by painting the plinth sides and edge of the 40MM base with several thin coats of Chaos Black (Abaddon Black) and base coated the top of both the plinth and small base the warlord was on using Hawk Turquoise (Sotek Green).
I shaded the base and top of plinth with Coelia Green shade and Devlin Mud (Agrax Earthshade) and then highlighted up the edges of the stones on both the plinth and small base using Hawk Turquoise mixed with Bleached Bone (Ushabti Bone), follow by a highlight of pure Bleached Bone.
Once these highlights were dry I applied a glaze of Coelia Green shade and Devlin Mud (Agrax Earth shade) as I wanted the base to look grubby, the result is shown in the picture above.
Step 2 - Basic colours

On all of the areas that were going to be warp crystal or warp related, I applied a base coat of Liche purple (Xereus Purple), followed by the first highlight of Warlock purple (Screamer Pink).
On the skin I applied a base coat of Codex Grey (Dawnstone) followed by a wash of Badab Black (Nuln Oil). I also applied base coats of Khemri Brown (Baneblade Brown) to his robes and Balthasar Gold to all the metal sections.
The pole of his weapon was undercoated with Scorched Brown (Rhinox Hide), his eye was painted using Mechrite Red (Mephiston Red) and the sash tied to his weapon was undercoated with Iyanden Darksun (Averland Sunset).
I wasn't sure that I was going to keep the base colour of the robes, as I was experimenting as i went along.
Step 3 - Highlight layers began to be added to his skin

I began to highlight the skin of the Skaven using several thin layers of Astronomican Grey (Celestra Grey), aiming to leave lines showing the darker shades below.
I then added Skull white (White Scar) in various amounts and built up the layers incrementally tying to make his skin look sickly and white.
 Once I was happy with the white skin, I applied several thin glazes made using Lamian Medium and Asurmen Blue (Drakenhof Nightshade) to tie the skin together.
Step 4 - His tail

The warlord's tail was base coated using Dwarf Flesh (Ratskin Flesh) and washed with Devlan Mud (Agrax Earthshade), I reapplied Dwarf Flesh leaving the shade showing through on the channels in the tail.
Once dry I Applied two more layers, first a 50/50 mix Dwarf Flesh and Elf Flesh (Kislev Flesh) and then a layer of Elf Flesh. Each time leaving a little of the previous layer showing and creating a series of lines along the tail.

Step 5 - The Warlord's new robes and the Warp Crystals.

I decided I didn't want to use Khemri Brown as the base colour for the robes and applied Scorched brown (Rhinox hide) as a new base colour.
I then applied Bestial Brown (Mournfang Brown), Vermin Brown (Skrag Brown), Snakebite Leather (Balor Brown) and finally bubonic brown (Zamesi Desert). With each successive colour I was selective about where I highlighted so as to leave some shade from the previous colours showing through.

Once the highlights were all completed I applied several purple glazes to tie the browns together.


Once happy with the robes, I turned my attention back to the warlords weapon and warp crystals. I had a while before decided that the warlord should have a Warp Crystal halberd to show his status and his awesomeness as a warrior.

I made sure all areas of warp crystal were base coated in Liche Purple and had a primary highlight of Warlock purple, then I applied a highlight of 50/50 Warlock Purple and Bleached Bone (Ushabti Bone) and then applied some very thin highlights of Fulgrim Pink and Skull White.
Once done, I applied a mixed glaze of Asurmen Blue (Drakenhof Nightshade), Baal Red (Carroburg Crimson) and Leviathan Purple (Druchii Violet) before a final glaze of Liche Purple and citadel 'Ardcoat (Gloss).
Step 6 - The yellow sash, Blue Fur and his Eye.

The warlord's yellow sash (Which I imagined from a dead Empire Captain) was washed using Casandora Yellow and then highlighted using Golden Yellow (Yriel Yellow), Sunburst Yellow (Flash Gitz Yellow) and a small highlight of Dorn Yellow on the very edges. Then a glaze of Casondora Yellow was applied to tie the yellows together.
I imagined the fur attached to his halberd was from a battle against a Yhetee from the Ogre kingdoms. So I painted the fur using layers of Regal Blue (Kantor Blue), Ultramarines Blue (Altdorf Guard Blue) and Enchanted Blue (Caledor Sky) with an extreme highlight of Ice Blue (Lothern Blue) before I glazed the fur with Asurmen Blue.
His red eye was highlighted using Red gore (Wazdakka Red), Blood Red (Evil Sunz Scarlet) and a tiny dot of Blazing Orange (Troll slayer Orange)
His red eye was highlighted using Red gore (Wazdakka Red), Blood Red (Evil Sunz Scarlet) and a tiny dot of Blazing Orange (Troll slayer Orange)
Step 7 - The Warlord's Armour.
After base coating his armour with Balthasar Gold, I highlighted it simply using Shining gold and then washed the armour with Devlin mud in the recesses. Then I created a verdigris effect by mixing Hawk Turquoise (Sotek Green) with Orkhide shade (Caliban Green) and painting this around rivets, in recesses and so on.
I didn't go overboard with the highlights as I wanted his armour to look tarnished and worn.
Step 8 - Attaching the shield arm and a thin layer of 'Ardcoat.
I repeated the processes for painting the armour, skin and warp crystal for the warlords arm as I had been working on the warlord and attached it at the end. Then once all the model was complete I applied a thin coat of Gloss 'Ardcoat to protect the model on the table top.
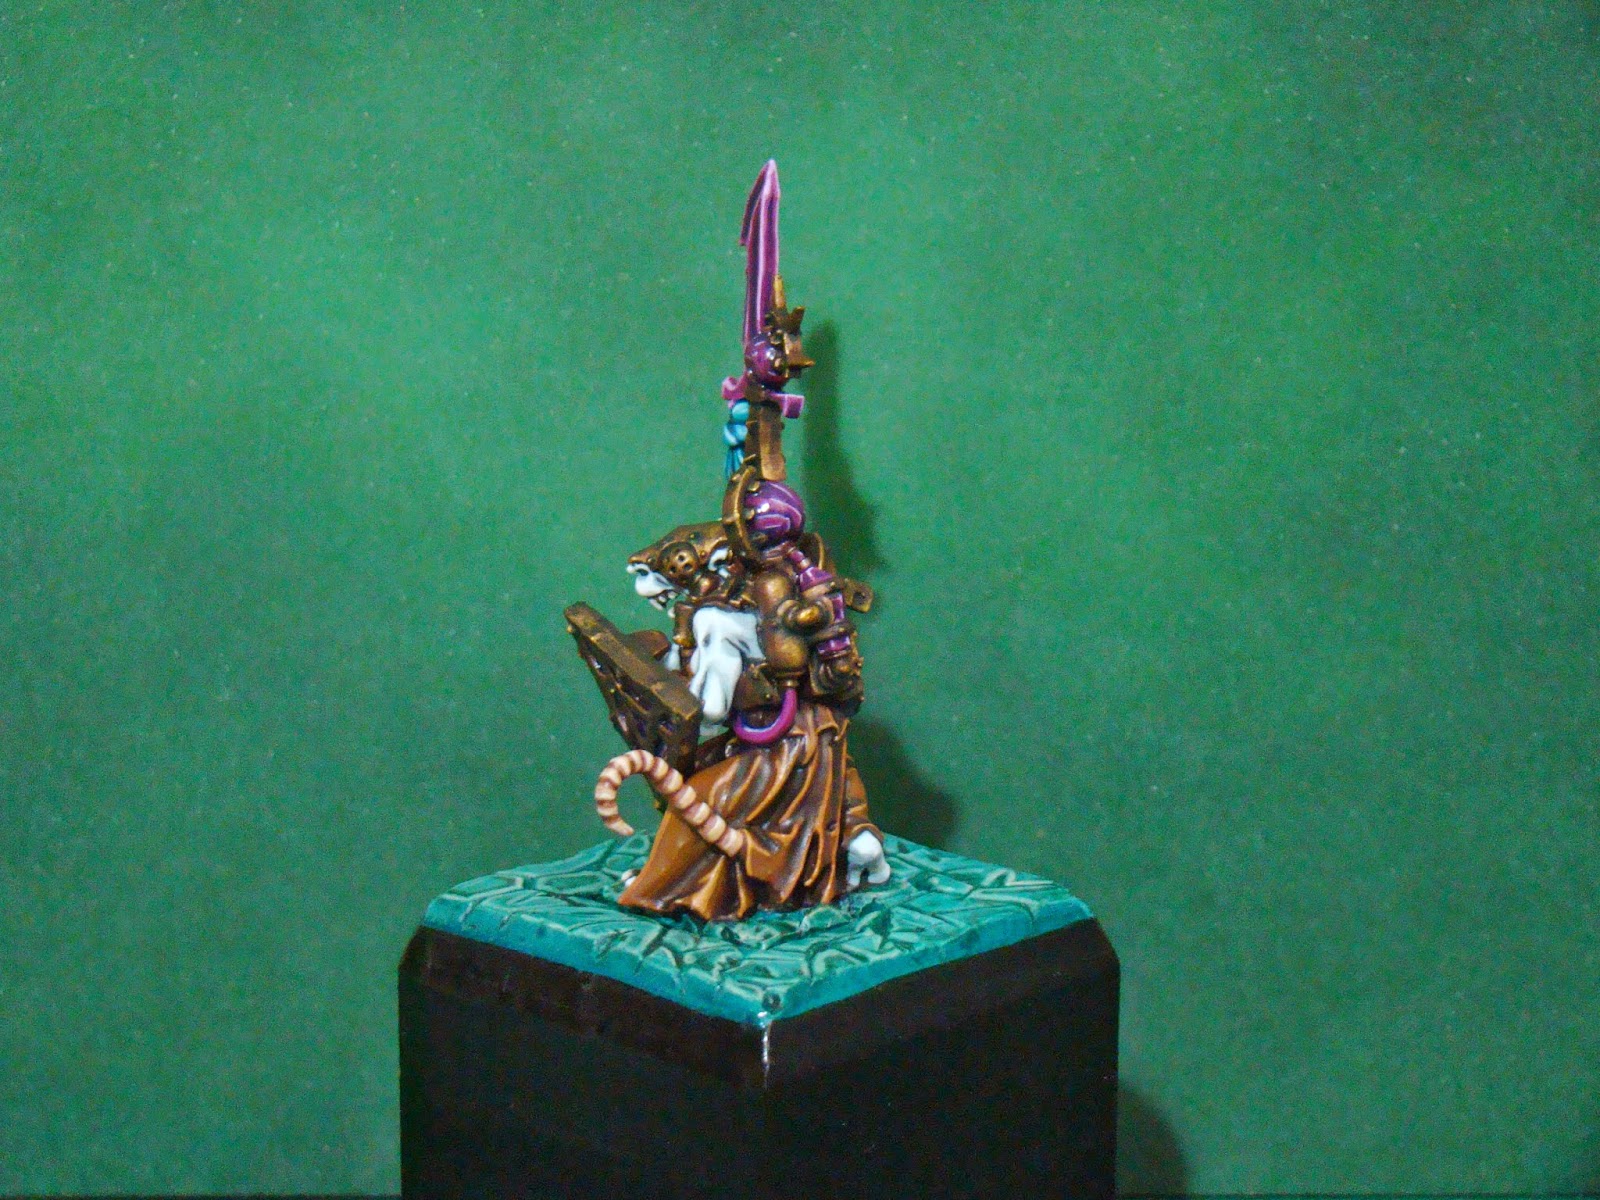
Below you can see the completed model.


No comments:
Post a Comment